Layered-Paper Rocking Horse

Rocking HorseIt’s ‘anything goes’ over at The Crafting Cafe this month, and the DT were given the pick of several digistamps from our sponsors The Stamping Boutique. I took on the challenge of this wonderful rocking horse image, and after some digital tracing created this layered paper (160gsm) decoupage sculpture – frame is 9″ square to give you a sense of scale. My Silhouette Cameo is certainly proving itself a useful purchase! There are no lines in sight, so the project relies on shadows to create the relief and sense of depth.

A couple of tips for you – take the glass out of the frame to take photos of your mounted project. I tried to light everything evenly, as normal for my project pics, but of course for this particular project even lighting just ruined it… Uneven light was the key. The first mount I tried was a single layer with equal padding all round – and it looked awful. So I used the picture framing practice of having a deeper section at the bottom and layered the mount as well and think it all works far better šŸ™‚

I hope to develop the technique further and create more original layered paper art.


Mixed Media – Exhibition Piece

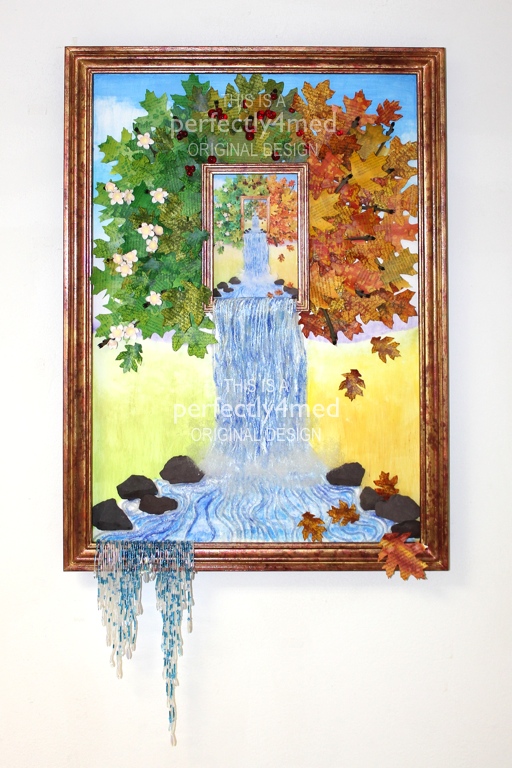
It’s been a while again since I’ve posted – I’ve been busy finishing off end of year projects at college, culminating in our exhibition last night. Here’s just one of my pieces (I’ll share some more in a couple of days), for the final mixed media module, inspired by the work of Jacek Yerka, my ‘chosen’ artist for this term.

Continue reading

Twelve Tags of 2012 – July and August

I have been creating, honest! I just can’t share some of what I have been doing due to commercial sensitivities, but as soon as I can, I will… and some of my creativity is on projects that are taking just that little bit longer to complete.

But I can share these two tags that I have done for this month’s Manic Stamper Craft Club, continuing my series of Twelve Tags for 2012. The first features triple embossing and a smidge of the frosted window technique for the ripples, as well as paper crafted water lilies. The second is napkin decoupage with a stamped and coloured image artfully placed on top. Fuller instructions will follow on the Manic Stamper blog once term has finished!

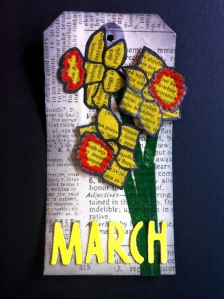
Twelve Tags for 2012 – March & April

Hi all – my journey into 2012 in tags continues, with March and April ready to be taught at the Manic Stamper Craft Club on 17th March. I note that a certain Mr Tim Holtz has copied me copying him and is doing his own monthly tags too šŸ˜‰ – check them out here. But before you do – here’s mine! Full instructions for March and April are posted over at The Manic Stamper blog.

Image transfer from wallpaper – technique tips

This started out as a cream coloured ceramic heart from DunelmĀ  and has had the magnolia image transferred onto it. The image comes from spare wallpaper used to decorate the room – an ideal way of making complimentary accessories.

Continue reading

A little bit of history…

Whilst sorting out the dining room, I had to go under the floorboards and found sections of the Leicester Mail and a Daily Express from Wednesday, 5th May 1937. The country was gearing up for the coronation of King Edward VIII a week later, and it was the day before the Hindenburg disaster. Fascinating reading! And whilst changing the radiator, I scraped off several historical layers of wallpaper. I’ve incorporated both, and the new wallpaper, into three art pieces to adorn the newly painted walls:

Ā Ā 

Each canvas panel is 12×12 inches, with the centre area painted in the room colour (Dulux Barley White) and edged with quarter inch brass tape from Ranger. The ageing was done with brown Neocolor II wax soluble crayon. Each section of newspaper was scanned and stuck down with matte multi-medium. The same was done with the wallpaper samples. The flowers are cut from the new wallpaper, Sanderson’s ‘Sweet Bay’ (Pattern No. DPFWSW102).

Dino Decoupage Card

This week at Passion for Promarkers, the challenge theme is ‘pre-historic’ [Week #97]. For some reason, once I’d found my image, the need to decoupage it seemed overwhelming! I’m really pleased with the results. I also experimented with colour choice and used only ProMarkers with the middle digit 2 or 3 – this helps keeps the tones complementary. Please let me know what you think.

UPDATE: I was in the top five for the challenge šŸ™‚

Continue reading

ProMarker Butterfly Card

20110404-040509.jpg

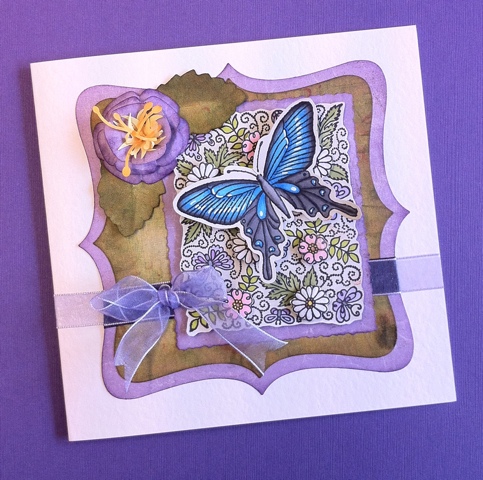
I’ve been busy this afternoon… I’ve finished this greetings card ready to enter into this week’s Passion for Promarkers Challenge (#93, ‘Bugs’). The butterfly [generic] is mounted onto a background [Personal Impressions Flower and Butterfly Background, PIRM002]. Both have been coloured with ProMarkers, and the flowers on the background have been decoupaged for depth. Paper Artsy Grunge Flower die used to construct the flower with Leone-Em punched shapes for the centre. Stamens were coloured with Gold ProMarker.

UPDATE: I was in the top five for the challenge šŸ™‚

Continue reading

Art Journal Elements – Autumn

Ok, so it’s nearly spring… but the colours I’d used to make the background papers inspired an autumnal theme! This is my first attempt at creating decoupage sheets suitable for many things, but I had art journaling in mind when I came up with the sketches. Please feel free to print out the sheets and use the images in your own art projects. If you share the sheets, please make sure my name is still on them. The sheets may not be copied as a part or a whole to be re-sold in any format without my permission. I’d love to know what you used them for!

Click on the images to open an A4 size version that you should be able to save and print out. If you would like a high resolution version, let me know.